In R12, We Can’t just directly get the Code Combination ( i.e Accounting Flex Field) Description from a single table. But Oracle has provided a package, which will help to get the description easily.

Script:
SELECT GCC.CODE_COMBINATION_ID,
       GCC.SEGMENT1,
       GCC.SEGMENT2,
       GCC.SEGMENT3,
       GCC.SEGMENT4,
       GCC.SEGMENT5,
       GCC.SEGMENT6,
       GCC.SEGMENT7,
       GCC.SEGMENT8,
       SUBSTR (
          APPS.GL_FLEXFIELDS_PKG.GET_DESCRIPTION_SQL (
             GCC.CHART_OF_ACCOUNTS_ID,
             1,
             GCC.SEGMENT1),
          1,
          40)
          SEGMENT1_DESC,
       SUBSTR (
          APPS.GL_FLEXFIELDS_PKG.GET_DESCRIPTION_SQL (
             GCC.CHART_OF_ACCOUNTS_ID,
             2,
             GCC.SEGMENT2),
          1,
          40)
          SEGMENT2_DESC,
       DECODE (
          GCC.SEGMENT3,
          NULL, ”,
          SUBSTR (
             APPS.GL_FLEXFIELDS_PKG.GET_DESCRIPTION_SQL (
                GCC.CHART_OF_ACCOUNTS_ID,
                3,
                GCC.SEGMENT3),
             1,
             40))
          SEGMENT3_DESC,
       DECODE (
          GCC.SEGMENT4,
          NULL, ”,
          SUBSTR (
             APPS.GL_FLEXFIELDS_PKG.GET_DESCRIPTION_SQL (
                GCC.CHART_OF_ACCOUNTS_ID,
                4,
                GCC.SEGMENT4),
             1,
             40))
          SEGMENT4_DESC,
       DECODE (
          GCC.SEGMENT5,
          NULL, ”,
          SUBSTR (
             APPS.GL_FLEXFIELDS_PKG.GET_DESCRIPTION_SQL (
                GCC.CHART_OF_ACCOUNTS_ID,
                5,
                GCC.SEGMENT5),
             1,
             40))
          SEGMENT5_DESC,
       DECODE (
          GCC.SEGMENT6,
          NULL, ”,
          SUBSTR (
             APPS.GL_FLEXFIELDS_PKG.GET_DESCRIPTION_SQL (
                GCC.CHART_OF_ACCOUNTS_ID,
                6,
                GCC.SEGMENT6),
             1,
             40))
          SEGMENT6_DESC,
       DECODE (
          GCC.SEGMENT7,
          NULL, ”,
          SUBSTR (
             APPS.GL_FLEXFIELDS_PKG.GET_DESCRIPTION_SQL (
                GCC.CHART_OF_ACCOUNTS_ID,
                7,
                GCC.SEGMENT7),
             1,
             40))
          SEGMENT7_DESC,
       DECODE (
          GCC.SEGMENT9,
          NULL, ”,
          SUBSTR (
             APPS.GL_FLEXFIELDS_PKG.GET_DESCRIPTION_SQL (
                GCC.CHART_OF_ACCOUNTS_ID,
                8,
                GCC.SEGMENT8),
             1,
             40))
          SEGMENT8_DESC,
       GCC.CHART_OF_ACCOUNTS_ID CHART_OF_ACCOUNTS_ID,
       GCC.ACCOUNT_TYPE
  FROM GL_CODE_COMBINATIONS GCC
  WHERE CODE_COMIBINATION_ID = :P_ID

Where: P_ID, you can pass Code Combination Id to get description for particular Accounting Combination.

We all know (I think :-)) the way in Oracle Forms to create context dependent descriptive flexfields. That is displaying additional segments within the form based on some other value in the form or maybe a value on a profile option.


These context dependent flexfields were at first not possible in framework because the references like BLOCK etc (which you can use in Forms) are not applicable to framework pages. Starting from release 12.0.6 of E-Business Suite there is a way to implement context descriptive flexfields on framework pages.

As an example I’ll use some example we encountered during an implementation. There was a requirement that additional details should be given to a control item in Project Management. Control Items in Project Management can be used to record your issues and risk on your running projects. In this case we have 2 Control Item Types being Issue and Risk. Based on the type we need to display additional segments in a DFF for the end user to use. This DFF must change with every type of issue.

To implement this behaviour we need to do a number of things:

  1. Implement the DFF and add segments on it for 2 context values (Issue and Risk)
  2. Implement a reference value used by the DFF which is the Control Item Type
  3. Enable the Descriptive Flexfield on the Control Item page of a project
  4. Add a so called Flex Map to the Descriptive Flexfield on the OAF page to hold the control item type (and used by the DFF definition
  5. Bounce Apache

Key thing in the above is step number 4. Starting from release 12.0.6 E-Business Suite introduces the functionality of Flex Maps. Follow the below steps to implement the behaviour. Of course the same method can be used in other parts of E-Business Suite if the page has a seeded DFF. If that’s not the case than also a self made descriptive flexfield can be added but I’ll write a post about that in near future.

Step 1: Implement the DFF for Control Items
a) Go to Application Developer – Flexfield – Decriptive – Segments and query the Control Item flexfield with the name Control Items Desc Flex.


b) Unfreeze the Flexfield Definition if needed. Tick the checkbox Synchronize with Reference Field to make sure the context is updated when you move along control items. Also untick the Displayed checkbox as we don’t want to show the Context field to the end user. Set the Reference Field. Add the syntax :$PROFILES$.<Name>. As a name anything can be used. Remember that name because we need it in a later step. In my example I’ll set it to :$PROFILES$.TypeCICyriel


c) Add Context Field values. I’ll add 2 values named Issue and Risk. It’s very important that these names represent the exact naming of your control item types. Add as many as you like representing each option you have for the types. Add your segments to the contexts and assign them to one of the attribute fields.


By default the segments are set to be a required segment. If applicable turn this off by opening the segment (click on Open) and untick the required checkbox.


d) When done adding your context field values and the related segments save the work and freeze the Flexfield definition. Your DFF should compile without problems.

Step 2: Handle the DFF on the framework page (Control Items)

Go to your Control Item page. If you don’t have the Personalize options enable the profile options and set it to the username who’s going to do the change. Change the below profile options and set it for the specific username on value Y (for Yes).
  • Create Seeded Personalizations
  • FND: Personalization Region Link Enabled
  • FND: Personalization Seeding Mode
  • HR: Enable User Personalization
  • Personalize Self-Service Defn

Make sure the DFF is enabled (Shown) for the page. If that’s not the case than click the Personalize pencil on the row Flex: (PaDescFlex) and change the rendered setting to Yes.


Step 3: Add a Flex Map (bean) to the DFF in OAF through personalization
a) Click on Create Item on the row Flex: (PaDescFlex). You get a new screen where you define the Flex Map settings.

b) Enter the ID which can be anything you want. Leave the Attribute Set and Comments blank. For Name you have to use the exact name as defined in the reference field setting in the DFF definition without the :$PROFILES$. I used the reference field name settting :$PROFILES$.TypeCICyriel so the name of the Reference Value of the Flex Map must be TypeCICyriel. 

The Reference Value is very important and will be the placeholder for in this case the Control Item Type name. This setting can use the so called SPEL language with which you reference an attribute of the page or view object of the OAF page. In this case the Control Item Type name is a seeded attribute of the ControlItemVO object of the page. We enter ${oa.ControlItemVO.CiTypeName} as the reference value. The Refers Context option needs to be set to true as we use this Flex Map as a context item.

c) Save all your work and bounce apache if the changes are not reflexted immediately.

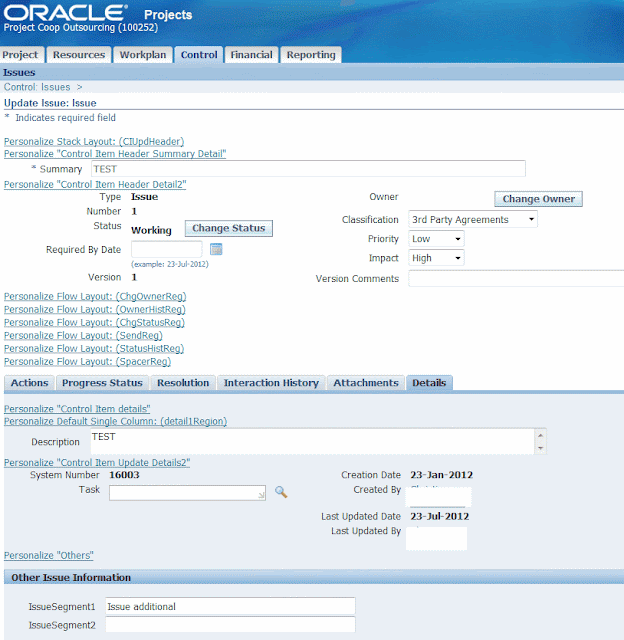
The end result will be that when you create a new control item being, in our example, a risk or an issue the applicable additional segments are shown for the type. We’ve unticked the Displayed checkbox within the DFF definition so it’s also not visible in the OAF page. See below the shots for the end results. Good luck with using this feature 🙂

Risk showing the 2 defined risk segments of the DFF (Context hidden)


Issue showing the 2 defined issue segments of the DFF (Context hidden)
There are 34 KFF’s available in Oracle 11i. They are as follows
S.No.
Flex Field
Owning Application
Maximum Segments
1
AHL Operation
Advanced Service Online
15
2
AHL Route
Advanced Service Online
15
3
Asset Key Flexfield
Assets
10
4
Category Flexfield
Assets
7
5
Location Flexfield
Assets
7
6
Group Asset
CRL Financials Assets
7
7
Super Group
CRL Financials Assets
7
8
Management Flexfield
Financials Intelligence
9
Accounting Flexfield
General Ledger
30
10
Reporting Attributes: Accounting
General Ledger
11
CAGR Flexfield
Human Resources
20
12
Competence Flexfield
Human Resources
30
13
Grade Flexfield
Human Resources
30
14
Item Contexts Key Flex
Human Resources
30
15
Job Flexfield
Human Resources
30
16
Personal Analysis Flexfield
Human Resources
30
17
Position Flexfield
Human Resources
30
18
Soft Coded Key Flexfield
Human Resources
30
19
Account Aliases
Inventory
20
20
Item Catalogs
Inventory
20
21
Item Categories
Inventory
20
22
ORACLE_SERVICE_ITEM_FLEXFIELD
Inventory
20
23
Sales Orders
Inventory
20
24
Stock Locators
Inventory
20
25
System Items
Inventory
20
26
Bank Details Key Flexfield
Payroll
30
27
Cost Allocation Flexfield
Payroll
30
28
People Group Flexfield
Payroll
30
29
PSB Position Flexfield
Public Sector Budgeting
30
30
ARTA-Receipt Prof Ident
Receivables
15
31
Sales Tax Location Flexfield
Receivables
10
32
Territory Flexfield
Receivables
20
33
Oracle Service Item Flexfield
Service
20
34
Training Resources
Training Administration
20
After defining System item flexfield next step to do is to define Item categories flexfield .
1. Go to Inventory responsibility and open Key Fleffield 
    Flexfield -> Key -> Segments

Key Flex Field

In flexfield title search for Item Categories.

Item Categories

2. Enter new record in this case ORK Item Categories. Now click on segments to enter segments summary.

3. You can define any number of segments according to your business requirement  here is this example we   will define three segments.

4. Enter first segment as Super Category. assign column and value set to this segment.
5. Repeatedly do above step for both next segments.Column indicates the database fields that will hold entered value for specific segment. Now enter your desired item segments name and their corresponding value sets.
6. Now freeze flexfield and compile it.
Oracle Inventory provides the following flexfields:

  1. System Items
  2. Item Catalogs
  3. Item Categories
  4. Stock Locators
  5. Account Aliases
  6. Sales Orders
  7. Service Items

Depending on your system’s setup, Inventory may also use some or all of the following
flexfields provided by other Oracle products:

  • Accounting (Oracle General Ledger)
  • Sales Tax Location (Oracle Receivables)
  • Territory (Oracle Receivables)

1. System Items
You can use the System Items Flexfield (also called the Item Flexfield) for recording and reporting your item information. You must design and configure your Item Flexfield before you can start defining items.

Owner Oracle Inventory
Flexfield Code MSTK
Table Name MTL_SYSTEM_ITEMS
Number of Columns 20
Width of Columns 40
Dynamic Inserts Possible No
Unique ID Column INVENTORY_ITEM_ID
Structure Column ORGANIZATION_ID

All Oracle Applications products that reference items share the Item Flexfield and support multiple-segment implementations. However, this flexfield supports only one structure.
You must set up your OE: Item Flexfield profile option to specify the Item Flexfield structure that you will use for your Oracle applications.
Users can also set up the OE: Item Flexfield Entry Method profile option to specify your preferred method of entry for this flexfield.
You can optionally use the item flexfield to default item information for invoice, debit memo, and credit memo lines or you can enter your own line information.
2. Item Catalogs
This key flexfield supports only one structure.

Owner Oracle Inventory
Flexfield Code MICG
Table Name MTL_ITEM_CATALOG_GROUPS
Number of Columns 15
Width of Columns 40
Dynamic Inserts Possible No
Unique ID Column ITEM_CATALOG_GROUP_ID
Structure Column None

 3. Item Categories
You must design and configure your Item Categories Flexfield before you can start defining items since all items must be assigned to categories. You can define multiple structures for your Item Categories Flexfield, each structure corresponding to a different category grouping scheme. You can then associate these structures with the categories and category sets you define.

Owner Oracle Inventory
Flexfield Code MCAT
Table Name MTL_CATEGORIES
Number of Columns 20
Width of Columns 40
Dynamic Inserts Possible No
Unique ID Column CATEGORY_ID
Structure Column STRUCTURE_ID

4. Stock Locators
You can use the Stock Locators Flexfield to capture more information about stock locators in inventory. If you do not have Oracle Inventory installed, or none of your items have locator control, it is not necessary to set up this flexfield.
 
Owner Oracle Inventory
Flexfield Code MTLL
Table Name MTL_ITEM_LOCATIONS
Number of Columns 20
Width of Columns 40
Dynamic Inserts Possible Yes
Unique ID Column INVENTORY_LOCATION_ID
Structure Column ORGANIZATION_ID

If you keep track of specific locators such as aisle, row, bin indicators for your items, you need to configure your Stock Locators Flexfield and implement locator control in your organization.
This key flexfield supports only one structure.

 
5. Account Aliases
This key flexfield supports only one structure.
 

Owner Oracle Inventory
Flexfield Code MDSP
Table Name MTL_GENERIC_DISPOSITIONS
Number of Columns 20
Width of Columns 40
Dynamic Inserts Possible No
Unique ID Column DISPOSITION_ID
Structure Column ORGANIZATION_ID
 
6. Sales Order
The Sales Order Flexfield is a key flexfield used by Oracle Inventory to uniquely identify sales order transactions Oracle Order Management interfaces to Oracle Inventory.

Owner Oracle Inventory
Flexfield Code MKTS
Table Name MTL_SALES_ORDERS
Number of Columns 20
Width of Columns 40
Dynamic Inserts Possible Yes
Unique ID Column SALES_ORDER_ID
Structure Column None

Your Sales Order Flexfield should be defined as Order Number, Order Type, and Order Source. This combination guarantees each transaction to Inventory is unique. You must define this flexfield before placing demand or making reservations in Oracle Order Management.

You must set up the OM: Source Code profile option to determine the source code you will use in for the third segment of this flexfield to guarantee that each transaction is unique. (Oracle Inventory defaults the value of the OM: Source Code profile option to ‘ORDER MANAGEMENT’.)
For your value sets, you must use Dynamic Inserts. The Validation Type should be None. Value Required should be Yes to improve performance of concurrent programs. The value set must be alphanumeric. The value set maximum size must be 40.
You should set the Required field to Yes in the Validation Information region when enabling the flexfield segments. Setting this field to Yes, improves performance when updating existing demand or reservations by guaranteeing that Oracle Order Management always supplies a value.
Set Right-justify Zero-fill Numbers to No so sales order numbers are not padded with zeros.
Oracle Inventory defines a unique ID for each order in MTL_SALES_ORDERS based on this flexfield. The Inventory unique ID, as opposed to the Order Management unique ID, is used throughout Oracle Manufacturing applications.

7. Service Items

The following table lists details for this key flexfield.

Owner Oracle Service
Flexfield Code SERV
Table Name MTL_SYSTEM_ITEMS
Number of Columns 20
Width of Columns 40
Dynamic Inserts Possible No
Unique ID Column INVENTORY_ITEM_ID
Structure Column ORGANIZATION_ID

The Service Item flexfield uses the same table as the System Item Flexfield. However, you can set up your segments differently with the Service Item Flexfield.