Create Accounting
1. What are the Subledger Accounting Setup and Usage FAQ’s?
This Document includes FAQs Customers found when setting up SLA, and issues found when transferring to General Ledger due to product usage:
– How to Transfer Accounting to General Ledger in Release 12
– How to Import and Create accounting definitions
– How to Transfer Invoices with Rules to General Ledger
See
Note 559064.1 for more information.
2. What are the FAQ’s for the R12 SLA Pre-Upgrade Process?
1. What is the function of the R12 SLA (Subledger Accounting) Pre-Upgrade program?
2. When and how do I run the R12 SLA Pre-Upgrade program?
3. What table is updated by the R12 Pre-Upgrade program?
4. What are the different status codes in the GL_PERIOD STATUSES table?
5. What criterion does the R12 Pre-Upgrade Program follow?
6. Where can I find the documentation for the R12 Pre-Upgrade Program?
7. What are the Application IDs that are considered by the R12 Pre-Upgrade program?
8. Once I have run the Pre-Upgrade program, can I re-run it with a different set of dates?
9. Where can I find information on the GL_PERIOD_STATUSES table?
10. How do I upgrade the accounting transactions after I have completed the R12 Upgrade?
For answers to these questions and more information, see
Note 604893.1.
3. How do you Run the Transaction Objects Diagnostics Program?
The Transaction Objects Diagnostics program basically depends on the Accounting Program for parameter values. Below are the steps to be followed to submit this program:
a. (N) System Administrator Responsibility>Profile>System
Set the Profile, SLA: Enable Diagnostics to Yes at user level.
b. (N) Payables Responsibility>Other>Requests>Run
Submit the Create Accounting program so as to pick some transactions or the problem transactions for accounting.
c. After the Create Accounting program completes, you can run the Transaction Objects Diagnostics program for the Invoice/Payment. Alternatively, you can run this program for the Accounting Program Request ID.
See
Note 558196.1 for more information.
4. What are the differences from the Subledger Accounting Methods, Standard Accrual Method and China Standard Accrual?
1. The China Standard Accrual SLAM (JA_CN_STANDARD_ACCRUAL) only has Application Accounting definitions defined for the Payables and Loans applications.
2. The China Standard Accrual SLAM (JA_CN_STANDARD_ACCRUAL) supports Project Number supporting reference on journal lines/headers to meet China localization requirement.
See
Note 602109.1 for more information.
5. How to Create A Manual Subledger Journal Entry
Manual entries are adjustments. If the adjustments are due to specific subledger activity such as Payables, then you may want to enter an SLA manual entry instead of a GL entry.
Entries recorded in SLA are tied to the subledger source and therefore provided more accurate subledger accounting reporting.
Enter account, debit, and credit amounts, and accounting class.
Optionally enter third party information, description, and currency details for each line of the subledger journal entry.
View the total accounted amounts of all subledger journal entry lines in the ledger currency.
Navigation: Accounting > Subledger Accounting > Journal Entries
There you can see Create Journal Entry button at the left side after the Advanced Search block.
See
Note 452748.1 for more information.
6. How to Correct Invalid Accounts Reported by the Create Accounting Process in R12 Payables
The Update Accounting Entries form was available in earlier releases of R11i to allow update/correction of invalid accounts created by the Payables accounting process. The R11i Update Accounting Entries form is phased out in 11.5.10 and is not available in R12. In R11i version 11.5.10, accounting is not created with invalid accounts; instead the accounting is reported in error and rolled back. The users are required to fix the invalid account referenced in the transaction data at the transaction level. R12 has similar functionality, if an account is invalid, the accounting is created with a status = Invalid. When accounting is created with a status = Invalid due to invalid accounts, the user should correct the transaction data or rule referencing the invalid account and then run the Create Accounting process again. Accounting with status = Invalid and Draft can be recreated each time the Create Accounting process is run. You can modify transaction data and rules to correct and change the accounting until you see accounting status = Final.
See
Note 459274.1 for more information.
7. How to Make the ‘About This Page Link’ or ‘Errors Details Link’ Available on R12 OAF Pages
To help diagnose errors in detail or see the About this Page information on an R12 OAF page, set the FND: Diagnostics profile to ‘Yes’ at the site level. The profile controls the display of the ‘About this page’ link. Setting the profile to ‘Yes’ also ensures that a detailed error stack can be viewed to help diagnose unhandled exceptions. When this is set to ‘No’, a simple error message asking the user to contact the System Administrator is shown; the detailed error stack is not accessible.
1. Navigate: System Administrator > Profiles > System
2. Query Profile Name = FND: Diagnostics and set it to ‘Yes’ at the site level.
3. Log out of the application and log back in.
4. Verify the ‘About this Page’ link is now available on R12 OAF pages.
5. Verify the ‘errors detail’ link is now available on R12 OAF page exception messages.
See
Note 454759.1 for more information.
GL Transfer
1. SLA: How to Troubleshoot AP TO GL Reconciliation
The purpose of this AP-GL Reconciliation Troubleshooting Guide is to assist the reader with reconciliation issues. In the simplest terms, AP-GL reconciliation means tallying the amounts in Accounts Payable (i.e., AP) for a CCID/Supplier and reconciling it to the figures in the General Ledger (GL).
See
Note 605707.1 for more information.
2. How to Setup Transfer to GL in Detail or Summary
Payables Manager responsibility has setup access to subledger options:
Setup #1
1) On the Navigator page, hit CTRL L to get list of forms
2) Select > Accounting Setup Manager Main Page
3) Find the ledger and click Go
4) Click Update Accounting Options
5) Scroll a little down to Primary Ledger heading section
6) Subledger Accounting Options click UPDATE
7) Click Next to find Payables
8) Click Update Accounting Options
9) General Ledger Journal Entry Summarization setup No Summarization
10) Click Apply when done
Setup #2
11) On the Navigator page, Setup > Accounting Setups > Accounting Methods Builder > Journal Entry Setups > Journal Line Type
12) Define how each line type will be transferred to the GL
13) Log out and back into applications
14) Test the Transfer to GL
See
Note 564706.1 for more information.
Period Close
1. How to Run the Unaccounted Transactions Sweep Program
See
Note 560378.1 for instructions on how to run the Unaccounted Transactions Sweep Program. The information presented is complementary to the Oracle Payables User’s Guide Release 12, Part No. B25454-04.
2. How to Troubleshoot Closing Periods in Payables
A period cannot be closed unless the following criteria is met for ALL operating units assigned to a ledger:
•All payment batches must be confirmed
•All transactions must be accounted
•All accounting entries must be transferred to general ledger
•All future dated payments which have reached maturity in the accounting period must have their status updated to negotiable and be accounted
See
Note 437422.1 for steps.
Trial Balance Report
1. How to Run the Accounts Payable Trial Balance Report in R12
Report Definition is required to run the Accounts Payable Trial Balance in R12.
If upgraded from R11i, Report Definitions should have been defined during the upgrade with the following name scheme: Liabilities Payables, i.e. Liabilities Payables, Vision Operations (USA)
If new install of R12, Navigate to: Payables Responsibility > Setup > Accounting Setups> Open Account Balances Listing Definitions
Review the Oracle Subledger Accounting Implementation Guide section on “Creating Open Account Balances Listing Definitions” for instructions on how to setup a new report definition.
See Note 554785.1 for more information.
2. How to Make the R12 Accounts Payable Trial Balance Report Show Detail or Summary Output
The R12 Accounts Payable Trial Balance has 4 templates available that control the output that is
displayed. The four templates available are:
Accounts Payable Trial Balance – Group by Account, Summary
Accounts Payable Trial Balance – Group by Account, Detail
Accounts Payable Trial Balance – Group by Third Party, Summary
Accounts Payable Trial Balance – Group by Third Party, Detail
Do the following to change the template that is used when the report is submitted:
1. Navigate: Payables Responsibility>Other>Request>Run
2. Select the Accounts Payable Trial Balance
3. Enter all of the parameters for the report. DO NOT SUBMIT THE REPORT.
4. Click on the Options button in the Upon Completion section of the Submit Request screen.
5. Select the desired template name.
6. Submit the Trial balance.
Do the following to change the default template used when the report is submitted:
1. Navigate: System Administration Responsibility>Concurrent>Programs
2. Search for:
Application = Payables
Program = Accounts Payable Trial Balance
Click on Go
3. Click on Update for the Accounts Payable Trial Balance program
4. Select the Onsite Setting tab
5. Select the default template from the Template dropdown in the General section.
6. Click on Apply to save the changes.
See Note 444044.1 for more information.
3. How to Have a Text Output for the Accounts Payable Trial Balance
In the Concurrent programs form for APTBRPT program check that ‘Output Format’ is XML.
In submit request form, select Output button in upon completion region, under layout region, choose a format like PDF or RTF.
For more information, see Note 554060.1.
4. How to Create R12 XML Report Output Formatted in Excel Instead of PDF
Do the following to change the Output Format that is created when the report is submitted:
1. Navigate: Payables Responsibility > Other > Request > Run
2. Select the report with XML output i.e. Payables Posted Invoice Register, Create Accounting Process, Accounts Payable Trial Balance, etc…
3. Enter all of the parameters for the report. DO NOT SUBMIT THE REPORT.
4. Click on the Options button in the Upon Completion section of the Submit Request screen.
5. Change the Format from PDF to Excel
6. Submit the report.
Note: XML reports should still be set to create XML output in the Concurrent Program Define form i.e. System Administrator > Concurrent > Program > Define > Set Output set to XML. And review Note 178133.1 “Setting up Word or Excel as a Viewer Option:” to make sure the Viewer Options and System Profile Options are set correctly to view Excel output.
See Note 568031.1 for more information.
5. How to Have a Text Output for the Accounts Payable Trial Balance
In the Concurrent programs form for APTBRPT program, ensure the ‘Output Format’ is XML.
In the submit request form, select the Output button in completion region, under layout region, choose a format like PDF or RTF.
See Note 554060.1 for more information.
6. How to Apply Journal Line Definitions Rules to the Manual Journal Entries
Is it possible to add the seeded Oracle Manual event class to an Application Accounting Definition? This would allow the users to define rules to be applied to manual journal entries in the subledger.
The answer is no. Manual SLA journal does not use rules. In R12, rules do not apply to manual journal entries in the subledger.
Whatever line type/account you enter, the system will take it and create an entry. The System will not consider rules for Manual Journal Entries.
See Note 452739.1 for more information.
ATTENTION:
Oracle Payables Community Join our growing Payables Community and learn from your peers and Oracle on how to address your unique issues in AP.
IMPORTANT If you did not find the information you were searching for, please review the following Payables documents:
Note 578232.1 R12 Proactive Intelligence Center: Oracle Payables
Note 396084.1 Oracle Payables Documentation Resources, R12
Note 562887.1 R12 Helpful Tips for a Successful R12 Oracle Payables Implementation
Note 557869.1 EBS R12 Oracle Financials Critical Patches
Note 405627.1 Oracle Payables Release 12 Known Issues
Additional R12 documents:
Note 580299.1 R12 Best Practices for Adopting Oracle E-Business Suite
Note 461705.1 EBusiness R12 Upgrade Guide
Note 602615.1 How to Locate the Latest R12 Product-Specific Information using New MetaLink Features
References
NOTE:437422.1– R12 Troubleshooting Period Close in Payables
NOTE:444044.1– How do you make the R12 Accounts Payable Trial Balance Report show Detail or Summary output?
NOTE:452739.1– R12: How to Apply Journal Line Definitions Rules to the Manual Journal Entries
NOTE:454759.1– How to make the About this Page Link or Errors Details link available on R12 OAF pages
NOTE:458371.1– R12: How to Get the R12 Trace and FND Debug File / FND Log for Payables Processes
NOTE:459274.1– How do you correct invalid accounts reported by the Create Accounting process in R12 Payables?
NOTE:554060.1– R12: How to Have a Text Output for the Accounts Payable Trial Balance
NOTE:554785.1– How do you run the Accounts Payable Trial Balance report in R12?
NOTE:560378.1– Unaccounted Transactions Sweep Program
NOTE:564706.1– R12: How to Setup Transfer to GL in Detail or Summary
NOTE:568031.1– How to Create R12 XML Report Output Formatted in Excel Instead of PDF
NOTE:605707.1– SLA: A TECHNICAL PERSPECTIVE OF THE AP TO GL RECONCILIATION
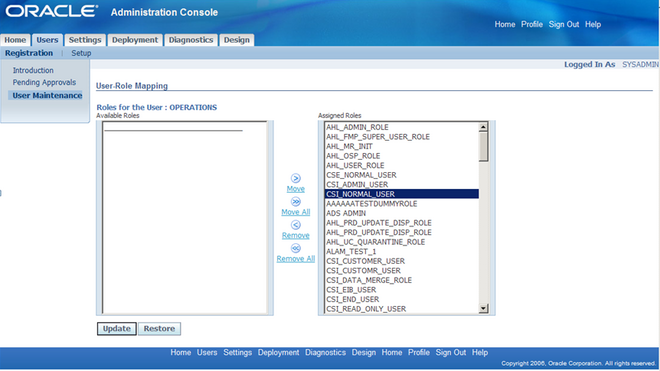 All All the functionalities of installed base module can be accessed with Installed Base User responsibility. And to access the’ Installed Base User’ responsibility’ the user must be assigned to CSI_NORMAL_USER role.
Recent Comments