Oracle Reports: Fixed format reports delivered with the 11i release were built on this tool. This is the most used tool for reporting on Oracle Applications. Most of reports customizations are built with this tool. Once customized the output of the report can be in Excel (Not group By Report), word, Acrobat documents or text format.

Oracle Discoverer: is an intuitive tool for creating reports and performing on-line analysis. Discoverer uses the EUL (End User Layer), a meta data definition, which hides the complexity of the database from the end user and provides easy to use wizards for creating reports to suit individual needs. The flexibility of this tool allows the user to create cross tab reports that perform like pivot tables in Excel.

Oracle XML Publisher: is a new Oracle tool for reporting. It enables users to utilize a familiar desktop tool, like MS Word or MS Excel, to create and maintain their own report. At runtime, XML Publisher merges the custom templates with the concurrent request extracts data to generate output in RTF, PDF, HTML and EXCEL.

RXi Report: (Variable reports) – variable format reports delivered with the E-Business 11i. With this tool a user has the ability to print the same report with multiple layouts. The user can also choose which columns he requires on a particular report. This tool is most used on Oracle Financials Applications.

FSG Reports (Financial Statement Generator): is a powerful report building tool for Oracle General Ledger. Some of benefits of using this tool are that a user can generate financial reports, and schedule reports to run automatically. The only drawback of this tool is that it is only available for the general ledger responsibility and can be used to see only financial account balances.

Business Intelligence System (BI):
is a set of tools to provide high level information for the managers (decision makers) to run their business such as the profitability of a particular business unit. The information this tool provides helps managers to take the right decision with the daily data that is uploaded on their systems

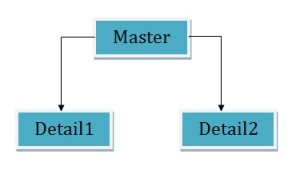
Fan Trap is a situation while running discoverer reports that return unexpected results due to a group of joined database tables. The most common manifestation of a fan trap occurs when a master table is joined to two or more detail tables independently.
If you use a straightforward SQL statement to aggregate data points here, you may get incorrect results due to fan trap. Now, if you enable fan trap detection in Discoverer and if you use Discoverer to aggregate the data points, Discoverer will never return incorrect results.

Example of Fan Trap:
Consider an example fan trap schema that includes a master folder (ACCOUNT) and two detail folders (SALES and BUDGET), as shown below:
Now let’s say we need to answer the question, “What is the total sales and total budget by account?
Straightforward SQL statement approach:
SELECT Account.Name,
SUM(sales),
SUM(budget)
FROM
Account,
Sales,
Budget
Where
Account.id=Sales.accid
AND Account.id=Budget.accid
GROUP BY Account.Name;


Account    Sales Budget


Account 1   800   1200


Account 2   130    200


Account 3    600   750


Account 4    600   600


The above results are incorrect, because they are based on a single query in which the tables are first joined together in a temporary table, and then the aggregation is performed. However, this approach causes the aggregates to be summed (incorrectly) multiple times.


Discoverer Approach:


If we run the query in Discoverer interrogates the query, detects a fan trap, and rewrites the query to ensure the aggregation is done at the correct level. Discoverer rewrites the query using inline views, one for each master-detail aggregation, and then combines the results of the outer query.


Here are the results from discoverer which is correct:


Account   Sales   Budget


Account 1  400      400


Account 2  130      100


Account 3  200      750


Account 4  300      200


How to enable fan trap in discoverer?


By default, fan trap detection is always enabled for you. If you want to disable it (however not recommended), you can logon to Discoverer Plus, go to Tools > Options >Advanced Tab and click on ‘Disable fan trap detection’.


How Discoverer handles fan trap?


If a fan trap is detected, Discoverer can usually rewrite the query using inline views to ensure the aggregation is done at the correct level. Discoverer creates an inline view for each master-detail aggregation, and then combines the results of the outer query.


In some circumstances, Discoverer will detect a query that involves an unresolvable fan trap schema, as follows:


  • If the detail folders use different keys from the master for the join

  • If there is a direct join relationship between the detail folders (thereby creating an ambiguous circular relationship)

  • If non-aggregated values are chosen from more than one of the detail folders

  • If more than one detail folder has a separate join relationship to a different master folder


In the above circumstances, Discoverer disallows the query and displays an error message.

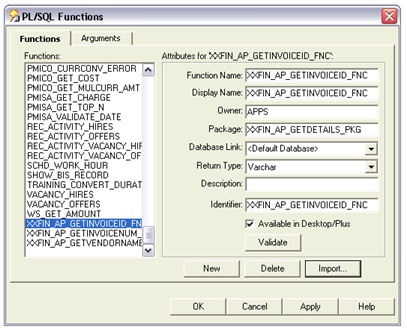
Although Discoverer provides many functions for calculation in reports, sometime we require to use custom PL/SQL functions to meet additional Discoverer end user requirements (for example, to provide a complicated calculation). For this we first need to create the functions in database through Toad or other PL/SQL editors.
To access custom PL/SQL functions using Discoverer, you must register the functions in the EUL. When you have registered a custom PL/SQL function, it appears in the list of database functions in the “Edit Calculation dialog” and can be used in the same way as the standard Oracle functions.
Note: To register a PL/SQL function you must have EXECUTE privilege on that function.
You can register custom PL/SQL functions in two ways:
  •  Import automatically, by importing the functions (recommended)
  •  Manually

How to register custom PL/SQL functions automatically:

To register PL/SQL functions automatically you must import them in the following way:
 1. Choose Tools | Register PL/SQL Functions to display the “PL/SQL Functions dialog: Functions tab”.
  
 2. Click Import to display the “Import PL/SQL Functions dialog”. This dialog enables you to select the PL/SQL functions that you want to import.

 
3. Select the functions that you want to import. You can select more than one function at a time by holding down the Ctrl key and clicking another function.
 
4. Click OK.
Discoverer imports the selected functions and displays the function details in the “PL/SQL Functions dialog: Functions tab”. Information about the selected functions is imported automatically. In other words, you do not have to manually enter information or validate the information.
 
5. Click OK.
The PL/SQL function is now registered for use in Discoverer.

How to register custom PL/SQL functions manually:

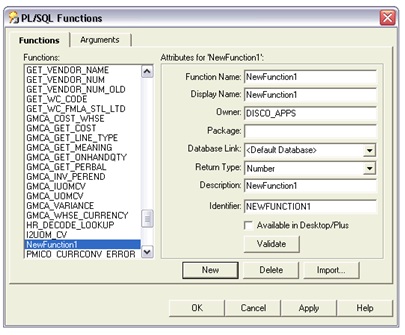
To manually register a PL/SQL function for use in Discoverer:
1. Choose Tools | Register PL/SQL Functions to display the “PL/SQL Functions dialog: Functions tab”.
2. Click New and specify the function attributes.
 
3. Click Validate to check the validity and accuracy of the information you have entered.
4. If the function is invalid, correct the attributes and click Validate again.
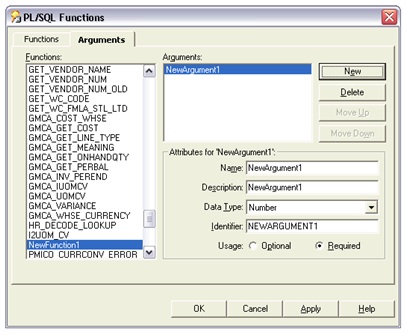
5. (Optional) if the function accepts arguments:
a. Display the “PL/SQL Functions dialog: Arguments tab”.
b. On the Arguments tab, click New and specify the argument attributes.
 
6. Click OK when you have finished defining the function.
The custom PL/SQL function is now registered for use in Discoverer.
It is always recommended to register PL/SQL functions by importing automatically (especially if you have many functions to register), because it is easy to make mistakes when manually entering information about functions. When you import functions, all of the information about each function (for example, names, database links, return types, lists of arguments) is imported.

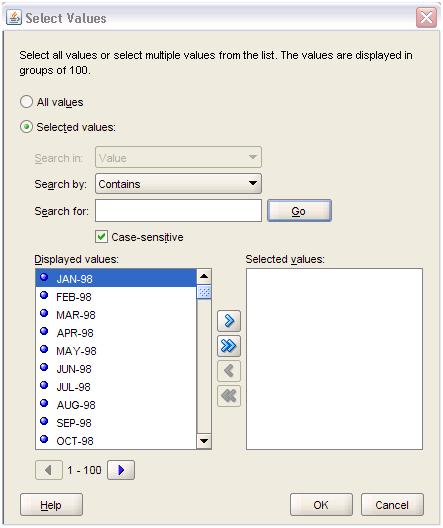
We can create list of values (LOV) for any parameter in discoverer reports through Item Classes. Here suppose in Discoverer Report, we have a parameter called Period Name. It has a small LOV icon in the right side.
When clicked on the LOV icon, the below window with all the Period Names will appear where you can choose one or many period names.
Now the question is how to do this. You just need to do the below steps to accomplish this task.

1] Create a custom folder named ‘Time Periods’ in a business area with the below query.
select  distinct
period_name,
period_num,
period_year,
decode(period_num,1, 'January',
2, 'February',
3, 'March',
4, 'April',
5, 'May',
6, 'June',
7, 'July',
8, 'August',
9, 'September',
10, 'October',
11, 'November',
12, 'December', null) month_name
from gl_periods;


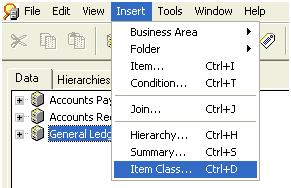
2] Select the business area in which you want to create an item class. Choose Insert > Item Class.


3] Select the LOV Item class attribute.


4] Select the above created folder (Time Periods) and choose the Period Name column.


5] Here you can select the various items of other folders that can use this item class. You can skip this stage and later you can manually assign this item class to other items.


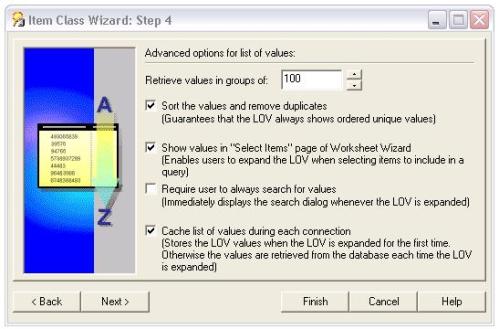
6] Choose the defaults and click next.


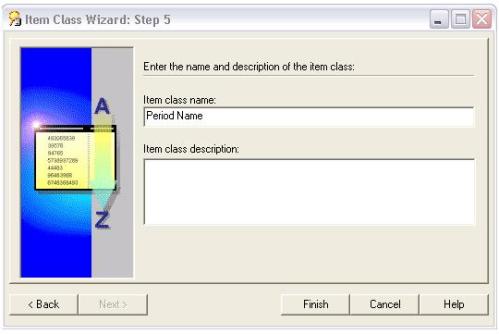
7] Give a suitable name to the Item Class


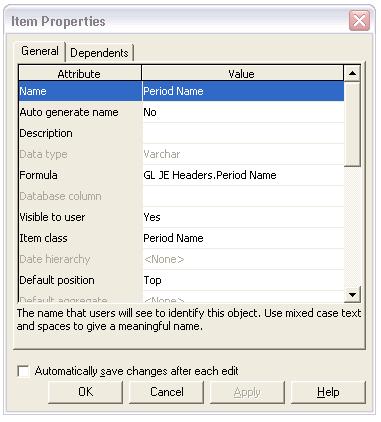
8] Now go to the Item of the folder on which you created the Parameter (Period Name) and then go to Item Properties. Here you assign the item class that you have created just now.


9] If you already created the parameter in your workbook and your discover plus or desktop is open then close it and reopen. Then you can view the LOV attached to the parameter.


10] If you haven’t already created the parameter, then create the parameter and run the report. You can view the LOV attached to the parameter.

Complex folders contain items from one or more base folders. It is same like a view in database. It enables you to create a combined view of data from multiple folders.
A base folder can be any of the following types of folder:
  • a simple folder, containing items based on columns in a single database table or view
  • a custom folder, based on SQL statements
  • a complex folder, containing items from one or more base folders
However you could produce the same result set using a database view instead of a complex folder. But using complex folders has few advantages over using database views.
  • When we use complex folders, the sql queries are automatically optimized by Discoverer. If we use view, we cannot get that improved performance.
  • We can create complex folders without database privileges, but for view creation we require that.
How to create complex folders?
1] Logon to Discoverer Administrator.
2] Select the business area in which you want to create a complex folder.
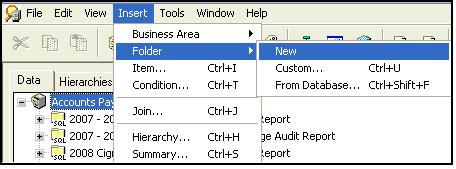
3] Choose Insert > Folder > New to create a new complex folder.
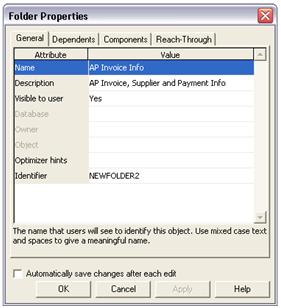
4] Click the new folder’s icon on the Data tab and choose Edit | Properties. We can give a more descriptive name, Description and Identifier Name for the new folder.

5] On the “Workarea: Data tab”, Drag an item from any folder in any open business area to the new folder. Or you can simply do copy and paste.
Tip: You might find it easier to drag items between folders if you have two Workareas open. To open a second Workarea, choose Window | New Window (Shift W).
Note: When you add an item to a complex folder, the folders that it comes from must be joined to the folder of at least one other item already in the complex folder. If this is not the case, Discoverer Administrator will display an error dialog. 
Note: If you select items from two folders that are joined using more than one join, Discoverer displays the Choose Join dialog. Here you can select one or more joins and click OK.
Note: If you select an item from a simple folder that has a join that conflicts with existing items, Discoverer will display an error and you will not be allowed to add the item.
If you want to see all the joins, conditions and the workbooks that are based on your complex folder, go to Folder Properties | Dependents Tab.
What is complex folder reach through?
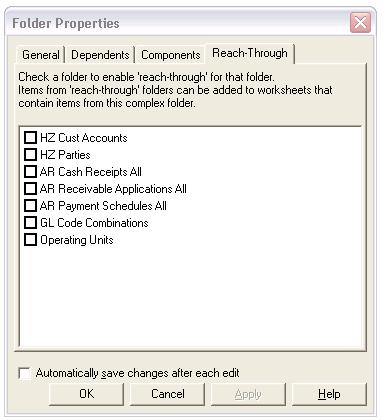
Complex folder reach through is a mechanism that enables Discoverer Plus and Discoverer Desktop users to add items to their worksheets in addition to those provided in a selected complex folder.
In Discoverer Administrator you can define one or more base folders within a complex folder as ’reach through enabled’. When a Discoverer Plus or Discoverer Desktop user selects an item from the complex folder, the associated reach through enabled base folders become available for selection in a worksheet.